This is a video about the project I was a part of last summer. I will be completing my edit this month and my contributions will be part of another 30-minute video that will air on KPTS next year. This is an incredible event and a rare opportunity. I was fortunate enough to participate in interviews with Ed Bass, Lyle Lovett and several other amazing people.
Saturday, December 11, 2010
Thursday, December 9, 2010
Wednesday, December 8, 2010
Thursday, December 2, 2010
Context: My First Short Film Script
Honestly, we wrote this in two hours, because we had procrastinated and had a one week deadline to submit the edited short film. Total rush project, but fun nonetheless.
Context
Context
Sunday, November 21, 2010
We Are Using Spanish in Wichita
My Spanish class produced a video to submit for the 2010 Language Learning for Life Video Contest sponsored by Vista Higher Learning.
Tuesday, November 2, 2010
How to Carve a Halloween Pumpkin
Here is a video I made for a class project. While visiting family for my sister's wedding, I enlisted my dad to carve a pumpkin for a training/how-to video assignment. I still don't have After Effects on my MacBook Pro, so I had to create graphics in Photoshop and animate them in Final Cut. I wish I could have spent more time on developing the graphics, but with my sister's wedding (rehearsal dinner, wedding, reception and travel), my deadline was quickly approaching and I had too much to do in a short time. That sexy voice you hear is mine. Please share this with anyone you know who may not know how to carve a pumpkin. It is a great tradition to share with your kids.
Music: Confugium Corvorum by Axis Mundi Actum courtesy of jamendo.com.
Monday, October 11, 2010
Symphony in the Flint Hills Preview
Today I presented a brief preview of the Symphony in the Flint Hills documentary that I've been working on with Corin Breña, Steven Ludlow and Fletcher Powell. The project is a collection of several self-contained shorter pieces, but I shot an interview with the Executive Director, Emily Hunter, on Thursday that will help bring these pieces cohesiveness. Take a look at this preview. Thanks again to Les Anderson and Amy DeVault for giving us this amazing opportunity.
Saturday, October 2, 2010
Hemophilia PSA: Dillinger
Last weekend I had the pleasure of working with my son, Dillinger, to produce a Public Service Announcement about hemophilia. It was a last-minute visit, so we didn't plan the PSA. It rained on Saturday, but the weather looked good Sunday, so we went to the park across the street to shoot Dillinger's stand-up shots. The footage of him self-infusing I shot in July while on vacation. I also used a photo from a year ago when we had to take Dillinger to the hospital for a bleed in his leg. Dillinger learned his script less than half an hour. He was great. We faced an unusual obstacle in the way of an air show. The only sunny day was the day of a huge air show, so jets were flying by every few minutes and we'd have to wait because it was very loud. Even so, it took us only 12 minutes to shoot the PSA. I am very pleased considering it was unplanned and we were limited by the weather and air show. Dillinger did a great job.
Wednesday, September 22, 2010
The Importance of Networking
Today I attended a meeting about the importance of networking. In fact, before the meeting, I went to lunch with a couple of producers I met through WSU and KPTS who I have learned a great deal about production from. It was nice to get together and pick their brains on motion graphics and fantasy football strategies.
Networking has been the key to my active involvement in production. It was persistence in asking for a job that landed me a part-time job at KPTS. It was my thirst for knowledge that opened doors for me to go into work and watch how they edited documentaries and promo spots. My desire to gain experience brought about invitations to work on several projects. Every one of them has taught me something and I am piecing it all together to make translating my ideas into something tangible much easier.
I had books and software, but it was the network of experienced professionals that truly launched my journey to becoming a professional producer. I love what I do and I have an insatiable desire to learn more, to have more tools with which to create.
Yesterday, I took a behind-the-scenes tour of Integrated Media Group in Wichita, Kansas. I saw a project they were working on in After Effects that looked incredible. I have no experience with motion graphic design, so I consulted two friends that do great work in this area. Not only did I get advice, but I spent a good portion of the afternoon looking over the shoulder of a friend as he demonstrated several ways to achieve my vision for logo animation in After Effects CS5. He also showed me a few other things that really sparked a fire in me to create stunning visuals in what would normally seem mundane projects.
Networking has helped me gain knowledge, experience, inspiration and friendship. I am grateful to all who have helped me and taken the time to share their knowledge and experience with me. If you are hesitant to speak with professionals in your field of work, I can reassure you that you have everything to gain and nothing to lose by putting yourself out there. As my old soccer coach used to say, "You can't score if you don't shoot."
Wednesday, August 11, 2010
Wednesday, July 14, 2010
Gear to Get You Started in Video Production
As a student of multimedia production, I am always looking for budget-friendly solutions for gear. Although I consider my gear affordable I realize that some of you may not, so I will try to provide options. This list provides the gear necessary to get you started in video production.
1. Camera
I highly recommend the Canon T2i (550D) with EF-S 18-55mm f/3.5-5.6 IS Lens or, if you can afford the extra $200, the Canon T2i (550D) with EF-S 18-135mm f/3.5-5.6 IS Zoom Lens
 . The zoom lens will provide greater flexibility and is sufficient for most projects. I also suggest purchasing the following accessories: a bag
 , an extra battery (LP-E8)
 , a Sunpak 67mm CPL Filter
 and a 67mm UV Filter
 . The pros of using this camera are quality and flexibility. You can take still photos and shoot full HD video (1920x1080p) with the same camera. The only considerations with shooting video with this are that you need a solution for capturing professional audio (I will discuss this later) and that you can only shoot about 12 minutes continuously before having to stop recording and starting a new clip. This isn't a big deal for most projects. If you are conducting a longer interview, then you simply do this while the interviewer stalls or is asking a question (it only takes a few seconds to stop and start again). If this is too much for you, or you want an affordable solution for zoom and pan shots, check out this Sanyo
 that shoots Full 1080p. It doesn't offer all the control that the T2i does, but the quality is great for the money. I have one of each and use them both.
 . For something better check out this Davis & Sanford tripod
 or if you have money to spare, the Manfrotto 504HD
 .
.
4. Sound
1. Camera
I highly recommend the Canon T2i (550D) with EF-S 18-55mm f/3.5-5.6 IS Lens
2. Recording Media
I use a Class 10 SanDisk 8GB SDHC memory card in my camera. I suggest having a back-up, as well. I can get about 20-minutes of 1920x1080p HD video on each card, so plan accordingly. I transfer my footage to my laptop and then re-use the same card, but I would have more if I could afford it. SanDisk also makes 16GB
 and 32GB
 cards.
3. Tripod
If you will be using mostly set shots (little to no movement), you can get an inexpensive tripod4. Sound
After much research, I decided to try out the Zoom H4n with an Audio-Technica AT803 lavalier microphone
 (great for interviews) and a 10-ft. XLR cable
 (or longer if needed) to connect the microphone to the Zoom H4n. If you don't already have a decent pair, get some headphones
 to monitor your recording levels on the Zoom. To save time in post-production, you can connect your Zoom to the camera's audio input with a 3.5mm cable
 , so the audio from the Zoom is already synchronized with the video. You may have to adjust your levels, then unplug the headphones to use the jack to plug into the camera. If so, it's OK, you can still monitor levels visually on the Zoom.
5. Lighting
I try to use natural lighting as much as possible, but Supplies for Video Production Light Kits is a video that identifies a good DIY solution. It is just one video in an educational series about lighting for video. This DIY Kit includes: Clamp Lights , Bar Towels
 , Daylight Bulbs
 , Indoor Tungsten
 lights, Clothespins
 , Stinger (short extension cord)
 , Extension Cord
 , Parchment Paper
 and Duffel Bag
 .
.
Also recommended in the Extras for Video Production Light Kits video are Gaffers tape , Black Foil
 and Light Stands
 . The video mentions also mentions a dimmer switch, but I don't see much use for that.
6. Post-production
I have a MacBook Pro and use Final Cut Pro at work and Final Cut Express
 at home. If you can afford the Pro, get it. If not, Express does everything you will need to do for nearly every project. If you have a PC, try Avid's Media Composer
 or Adobe's Premiere Pro CS5
 . All are available for Mac, as well. Moving beyond the basics, I encourage you to check out Adobe After Effects
 for motion graphics. Creating motion graphics can add a lot to even the most basic videos. Don't forget... students can usually get a discounted rate for all of this software. After editing, I either export for the web or create a DVD in iDVD
 on my Mac. I'm not familiar with the PC equivalent.
Preview Samples
My Videos page displays videos in which I have used this equipment (except for the tripods and DIY lighting - I use a cheap tripod but am fortunate enough to have access to professional lighting). This will help you get an idea of what the camera quality is (cameras used are listed below video under "tags" if you click the title), as well as how the audio sounds with the AT803 and Zoom H4n.
Thursday, July 8, 2010
Do-It-Yourself DSLR Viewfinder
 I am way behind on posting this, but I have been on vacation, editing video for Symphony in the Flint Hills and keeping up with 12 hours of summer coursework. I had to find a quick solution to a common DSLR video problem: seeing the LCD screen during sunlight. The problem with shooting video on a DSLR camera is that you have to view it on an LCD screen, which in sunlight is hard to see clearly. You can't tell if your exposure settings are OK, if the white balance is correct... and it makes things difficult. Many companies offer professionally-made viewfinders to overcome this, but I cannot afford one of these... so I made a DIY one that costs $20 including all the tools and supplies if you don't already have them. This is a picture - courtesy of Amy DeVault's iPhone - of me using it (to much laughter from my peers) at the Symphony in the Flint Hills. I even had one person say they did not want to be seen with me while using this. Although it looks less attractive than the professional counterpart, it accomplishes the goal and I was able to see my LCD screen clearly, set my exposure correctly and get the right focus.
 Here's how I made it:
1. Late night trip to Wal Mart
2. Small tupperware container ($5)
3. Utility Knife ($3)
4. Rubber foot - for chair legs ($4)
5. Black adhesive or duct tape ($6)
6. Toilet Paper Roll ($1 for pack of TP)
I cut the tupperware bottom (with a utility knife) to the size of my LCD screen. Then I covered (inside or outside) the bottom piece with black adhesive to keep light out. Then I cut a hole in the lid slightly smaller than the rubber foot and squeezed the foot so that it fit firmly in that hole. I used this to anchor the toilet roll (which is necessary to extend the distance so your eye can focus the screen). I then covered all the remaining areas of the lid and the toilet roll with black adhesive and placed the lid on the bottom piece. The DIY viewfinder worked to keep sunlight out and allowed me to set my exposure and view my screen clearly.

Wednesday, June 9, 2010
Cheap Mount for Zoom H4n
 I am shooting video with a Canon 550D and using the Zoom H4n for audio. The quality is great, but when working alone, this can be a painful set-up. I carry a backpack with my camera gear and another small case that holds my audio gear (Zoom, lav mic, XLR cable, tabletop tripod...). The problem is that when I want to be mobile and "run n gun" I cannot carry my tripod, camera, Zoom, mics, cords... I have found several blog posts that offer great solutions, but all are more than I can afford right now.
 My favorite set-up and the one I plan to use is the one Juan Pons posted. Today I went on a mission to find a budget-friendly solution that will help me move faster this weekend while I shoot the Symphony in the Flint Hills. I bought the PlatinumPlus flexPod gripper by Sunpak at Best Buy for about $20. I had an idea that I could find a way to wrap it on my tripod nice and tight and mount my Zoom on it.
I went home and tried it and it was easy to wrap it and stabilize it so my Zoom wouldn't jerk around and pick up noise. I am posting two photos (although I erased my messy home from the background) to show you how I set it up. I tested it out, placing my 550D on the tripod and the Zoom mount on the tripod's leg. It was easy to pick up and carry my tripod to a new location. The only thing I had to break down was the mic and cords that run to the Zoom. This cuts my set-up and breakdown time in half and makes me real happy... and all for $20.

Friday, May 21, 2010
Tuesday, May 11, 2010
Busy, Busy, Busy
School, work, family... what else can I possibly have time for? Volunteering to shoot the Kansas Sports Hall of Fame Golf Tournament at Sand Creek Station in Newton, Kansas... that's what. Yes, I am very busy, but last friday I drove up to Newton to spend a day on the golf course. I had a great time and a great conversation with Ralph Terry, a pitcher from Larned that played for the NY Yankees and won two games, including a complete game, four-hitter, in Game 7 of the 1962 World Series to win the championship. Did I mention he was named MVP of the series? He has a great sense of humor and is extraordinarily nice. By the way, he became a professional golfer after baseball and last friday his team won the golf tournament I shot. Anyway, I have a lot of footage to watch and edit into a short piece for the Kansas Sports Hall of Fame Web site.
Today I met Craig Barton, the son of W. Frank Barton (as in the W. Frank Barton School of Business at WSU). I went to shoot a Signal Society spot for KPTS. Craig is a great guy and extremely down-to-earth. He had several autographed photos and magazine covers with famous golfers and U.S. presidents in his office, along with oil paintings of late-18th/early-19th century period scenes. He loves history and values the historical programming that KPTS offers. It was a great experience. I'm pretty sure that he is the wealthiest man I have ever shaken hands with.
Tomorrow I continue training. I am learning to direct the Sedgwick County Commission meetings for KPTS. I hope to direct this show and many others someday in the near future, so I am trying to learn as much as possible.
I also love spending time with my family. On Tuesday and Thursday evenings, my daughters have gymnastics classes on the opposite end of town. This will be the first saturday that my boys do not have soccer games, however I have a final exam at 8am, then I will be operating one of the cameras at the WSU baseball game that afternoon. On the weekends we all (Amber and I, two boys, two girls and one dog) spend time together, so I keep pretty busy trying to juggle all of these responsibilities.
Wednesday, May 5, 2010
CPL Filter Test
I saw a Circular polarizer (CPL) filter at Best Buy and decided to test it out. I was in class late, but got home and put it on my T2i and stepped outside to shoot. It was already really dark in the shadows, so I will have to test it again in the noonday sun. Anyway, all the exposure settings are listed in the video.
Tuesday, May 4, 2010
Funding Your Projects
 OK! So you have this great idea for a project, but have no idea how to secure funding to make it happen. Before you put it on the shelf of great ideas that were never realized, check out Kickstarter, a funding platform for creative pursuits of many kinds.
I have read just about everything on their site and I have concluded that this is a great opportunity for producers, at least to get feedback on your ideas. The worst thing that can happen is a project doesn't get funded and you are back where you started... except you at least received feedback on the demand for your product. With easy tools that allow you to share and promote your project through social media, you may just muster up enough support to make some money doing what you want.
Thursday, April 29, 2010
Creating an Online Portfolio
I chose to host my portfolio on a free blogging platform. I had a blog on Wordpress, but without your own server to host your files, you need to use the free Wordpress. I didn't like this, because they make you purchase many plug-ins to use the same features that you can get free with Blogger. I absolutely hated Tumblr. Not all Tumblr templates offer the basic Comments widget that allows users to comment on your posts. This annoys me as a user and it discourages interaction. I've seen blogs on Tumblr where people ask you what you think, but there is nowhere to tell them... no Comments section, no contact info.... Other popular platforms (I haven't tried) include LiveJournal and many of Six Apart's platforms (TypePad, Movable Type, Vox...).
The easy choice for me is Blogger. For beginners, they offer many drag-and-drop or click-to-add options for designing your layout and publishing your blog. For those who know HTML or CSS (and anyone can learn the basics easily), Blogger offers the ability to load your own XML document with your custom design, the ability to use one of many free templates online, or the option to just use one of their default templates. It is highly customizable in the simplest way and it is FREE.
I added a few features that I think are essential for any blog:
- A custom banner at the top. (Your template should tell you the size. ex: 860 x 130 px)
- Add This buttons (you can see them at the bottom of each post in my blog) make sharing info from your site as easy as the click of a button. You can customize the look, the list of sites you can share to (more than 200)...
- A Contact Me form allows readers to contact you/give you feedback/interact. You can either write your own JavaScript code or use an online service. I use WuFoo. It is free and allows you to customize your form (choose what fields to include, which are required and which are optional...) and embed it on a page on your portfolio site. This helps by keeping your email private. Otherwise spambots (evil programs that search the Inernet for email addresses, so they can sell it to all those annoying marketers that send spam) will find it on your site and you will begin getting loads of spam mail.
Sunday, April 25, 2010
KPTS Promo Shoot
Last Monday, I was able to join Gabe and Stacey at KPTS for a promo shoot. We set-up in the studio with field lighting and shot with a Canon 7D and a Canon T2i (550D). For audio, we set my Zoom H4n on a tripod and ran a lav mic into one of the channels. It was a pretty smooth shoot and even easier transferring the files. Gabe edited two promos from the shoot and posted them on his Vimeo page. It was only the second time that I used the H4n and I think the audio came out great. Tell me what you think.
Credits:
Gabe Juhnke: Producer/Camera/Editing
Stacey Jenkins: Producer
Mark Kenny: Camera/Audio
Credits:
Gabe Juhnke: Producer/Camera/Editing
Stacey Jenkins: Producer
Mark Kenny: Camera/Audio
ESC Merit Awards
I have been really busy lately and did not get to submit anything for merit awards. I have been re-designing my site from a mere blog to an effective portfolio to direct potential employers to. This new site features a home page with a bio, a resume page, a video portfolio page, a design portfolio page, my blog page and a page with a form to contact me. I learned more HTML and CSS than I ever cared to learn, but I believe the site is an effective form of communication. I even created a favicon for the bookmark and address bars, as well as an iPod/iPhone icon to display if iPhone users add my site to their homescreen. I can't help it that I am very detail-oriented.
Anyway, I was bummed that I did not get to submit anything for the merit awards, but I decided that I'd rather have a solid portfolio that shows employers my skills rather than a piece of paper that claims I have them. Not to write-off merit awards... I am merely saying I had only enough time to dedicate to one pursuit, so I chose my portfolio. Good luck to everyone who submitted entries. I will be attending the ceremony on May 11th and look forward to seeing who receives the awards.
Monday, April 12, 2010
Keeping Up

I am working on several projects at once. I am editing footage I shot with my new T2i from my family's Easter. I think I have a reason to use split screen at a point in this project. My kids and their cousins found a turtle and I captured footage of the turtle walking, as well as the kids' reactions. I think this would be great as a split screen with the kids looking in the direction of the screen showing the turtle. Alone, each of these shots would be boring, but I think as a split screen it can capture the excitement and wonder they experienced and the viewer will be able to see what they were excited about.
I am also shooting a couple of career profiles (video portrait style) that I hope will show students what production jobs are like.
(609:Project 4) I'm profiling Gabe Juhnke, the Production Manager at KPTS, and (609:Project 5) Stacey Jenkins, a producer at KPTS. I am shooting on my T2i and have already started collecting footage. I took my camera to work and got some shots in the control room during the production of Ask Your Legislator. I'd like to get shots of each of them performing various aspects of their jobs: directing in the control room, shooting in the field, editing and directing personnel. I also plan to use some of KPTS's footage in my edit.
I am also planning a video portrait (609:Project 6) of my other boy who has hemophilia. He is 8 and self-infuses... meaning he sticks the needle in himself and is learning to give his own meds. This will be the focus of this video and I may again employ split screen to show him infusing on one screen and on the other (or others) I'd like to show some ways in which he lives a normal life: playing soccer, at the playground, going to school...
I finished editing my Center of Hope video. I'm not completely satisfied with it. I wish I could have captured more shots, but some things were out of my control and I had to work with what I had. Despite this, I learned how to import alpha channels from Photoshop and I was able to experiment with text motion graphics. I wish I had time to experiment with AfterEffects, but not yet.
Anyway, I'm busy... and this is why I have been neglecting my blog.
Thursday, April 8, 2010
Center of Hope Video
Here is the first cut of my latest project. Description is below the video.
Center of Hope from Mark Kenny on Vimeo.
A promotional video for the Center of Hope, a homeless prevention program in Wichita, Kansas. Anita Cochran is the reporter. I shot with a Panasonic DVX, but also used some footage Anita had, and edited this piece for a fundraiser event. I created the graphics and shot the interviews with Bill, Brenda and Amy, as well as some of the B-roll at the Center of Hope office downtown. The interview with George and most of the B-roll at the Center of Hope was provided to me and I simply edited it into this video.
Tuesday, April 6, 2010
Hollywood Video
Hollywood from Mark Kenny on Vimeo.
Went to Hollywood and Santa Monica in August 2009 for an Inhibitor Summit. Shot some home video on a Canon FS22. Hated that camera, but last night I decided to edit a little piece to remember the trip. This was very challenging since I didn't shoot it for a project, it was just random shots while we were out. I didn't want to miss the moment by trying to get "money" shots.
'Pachelbel Kanon' by Detroit Illharmonic Symphony. Courtesy of BeatPick.com.
Just Do Something
OK! I have been collaborating on a project and I am waiting on audio, so I have become very bored. I finally decided to just do something. I didn't want to plan and shoot, then edit, so I decided to dig through the home video archive. I found some video from a trip Amber and I took to Hollywood and Santa Monica. I didn't shoot this video to ever be edited. Honestly I just kinda left the camera on while we did stuff and occasionally stopped to get a shot. None of it was framed or planned to be used for anything other than remembering our trip with raw footage. Not sure why I wanted to use this footage, but I think I wanted to see if I could make a decent edit with not-so-great footage. I wanted to have a montage of quick cuts mixed in, also. I also had to find a way to transition from day to night shots. I'm typing this as some video renders, so I will finish it and post it soon.
Tuesday, March 30, 2010
Video Lighting on a Budget and Other Tutorials for Video Production
Here is one of the videos we looked at in class today. There is a whole series of videos on lighting by this guy. I like this, because he provides cheap solutions for independent producers.
Supplies for Video Production Light Kits -- powered by eHow.com
I also found another guy that has a great video series about making digital video, more than just lighting. Here is a link to one of his videos. You can access the whole series from this page. I have bookmarked both series on my delicious.
Lighting Basics for Making a Digital Video -- powered by eHow.com
Sunday, March 21, 2010
World Hemophilia Day Poster: Design 2
Here are some variations for my second design. This design does NOT promote a walk, or any other fundraiser event. It simply raises awareness of hemophilia by announcing World Hemophilia Day. It takes place on April 17th every year, regardless of what day of the week it falls on. This happens to be my daughters birthday, as well.


Saturday, March 20, 2010
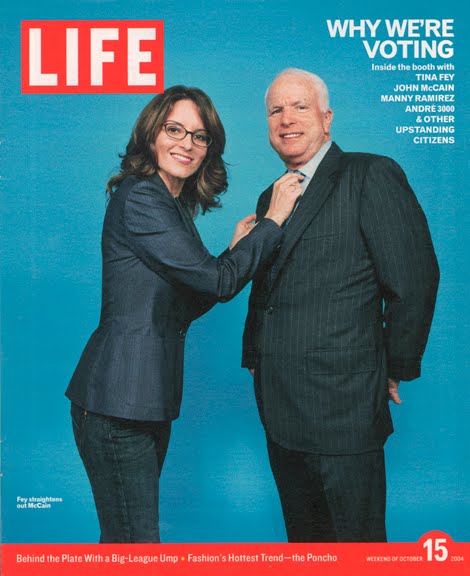
World Hemophilia Day Poster
OK! I saw a LIFE magazine and decided I was going to use this design for my poster. I changed the name of the magazine to WALK, since the poster promotes a fundraiser walk. I used the hemo globe I designed as the centerpiece of the cover and then just input the information I wanted to share in traditional magazine style. Here is a look at my poster and the LIFE cover that inspired me:


Saturday, March 13, 2010
Starting The Wish List
OK... so I started the evening contemplating purchasing a Canon T2i. Unsatisfied only with the audio collection capabilities (no surprise... it is a digital SLR), I stumbled across a thread in which someone recommended using a Zoom H4n to capture audio and then syncing it with Singular Software's PluralEyes in post production.

Singular Software claims that PluralEyes can perfectly sync multiple-cameras without the hassle of using a slate, clapping hands or using a flash to set a common timecode. This sounds awesome to me, but you need Final Cut Pro or Vegas Pro to run PluralEyes. Unfortunately, I have Final Cut Express... for now.
I also found a link to The Levelator at Singular's site, although it is actually not their software. The Levelator automatically evens out the sound levels of an audio recording, which will be very useful for interviews with both interviewer and interviewee audio or other multiple-person recordings.
I already have an unwritten wish list of toys I "need" to produce good video, but I am going to start documenting that list now. By no means are the items on the list prioritized in the order that I want to get them. Tonight I am adding four items to The Wish List:
- Canon EOS Rebel T2i Digital SLR Kit w/ EF-S/18-55 IS $899.95
- Zoom H4n Handy Recorder Kit with 8GB SD Card and Remote Control $319.95
- PluralEyes by Singular Software $149.00
- The Levelator Software Free Download
Wednesday, March 10, 2010
Hemaware Adds My Life With Hemophilia Video to Site
The National Hemophilia Foundation launched a new site for their publication Hemaware this month and they asked me if they could post my video to the site. I am very happy that a project I had almost given up on took a turn for the better and has reached so many people. My hope was to raise awareness of hemophilia by showing how it affects a person in one specific way. I would like to produce many more in a series that highlights the impact it has on specific aspects of a hemophiliac's (or caregiver's) life. I am very excited that Hemaware liked it and posted it to their site for more people to see. On a technical note, I noticed that the video was sized much smaller and compressed even more, so when you click full-screen it is bad quality, but I understand they must consider file size and space on their servers.
I have also been asked to allow the Hemophilia Federation of America to post it on their site and am working those details out now. Hopefully it will be on their site very soon and the video gets the exposure I had hoped for.
I appreciate everyone's feedback and help with promoting this video. You can see it at the following links:
http://hemaware.org/community-pulse
I have also been asked to allow the Hemophilia Federation of America to post it on their site and am working those details out now. Hopefully it will be on their site very soon and the video gets the exposure I had hoped for.
I appreciate everyone's feedback and help with promoting this video. You can see it at the following links:
Thursday, March 4, 2010
Designing a Poster for World Hemophilia Day
This is the centerpiece of my poster and this is how it came to be:

I posted an image of the graphic that the World Federation of Hemophilia provided for use in promotional posters, but I wanted to create my own take on it. First, I envisioned a 3D globe that better represented the hemophilia world. I think of the color red (representing blood), not blue. I had an idea to create a clipping mask of a crowd of people in the shape of the continents and to make the water red, then create a 3D sphere with this image.
I found a good image of faces painted, each with a flag representing a different country. I made modifications to fit my purposes. First, I eliminated the borders from the faces image I found:


Then I found a map of the continents to use to create a clipping mask:

I placed the map image on a layer below the wallpaper of faces. I selected all the white areas of the map layer and deleted them, leaving only the black shapes of the continents. Then I chose the faces layer and created a clipping mask to get the image below:

Next, I found a water texture I could use for the oceans:
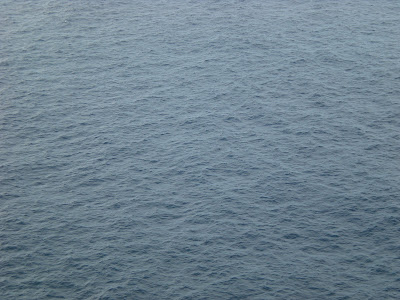
I changed the hue and saturation to make it red, then placed it below the layer of faces to place the water behind the continents:

I have Photoshop CS4 Extended, which has 3D capabilities, so I flattened my image (to one layer) and made a 3D shape from that layer. Since I am making a globe, I chose a sphere shape. At this stage, I began following a tutorial I found at psd.tutsplus.com:

I added 3D elevation/topography and clouds to my globe:

Finally, I added a shadow and reflection. Now I have completed the centerpiece of my poster:

I have several ideas I want to try out next. I thought about creating some paper dolls walking to the globe from the left, going around the back and appearing from the back on the right side, then walking along the surface of the globe in a (-shape and ending with one sanding in the vicinity of Norway. I also thought about having paper dolls holding hands in a circle around the globe, but since the poster will promote a fundraiser walk in Wichita, I think the walking paper dolls are more appropriate.
Subscribe to:
Posts (Atom)